컴퓨터/Game2016. 1. 5. 14:49

● HOW TO INSTALL PUSHBULLET AND WHAT IT DOES!


HOW TO INSTALL PUSHBULLET

  1. Head over to http://www.pushbullet.com to register an account or log in via facebook/google+.
  2. Download and install Pushbullet from the app/play store.
  3. Login to your Pushbullet account from your mobile.
  4. Head over to http://www.pushbullet.com/account and copy your access token into the clashgamebot interface and select your options.
  5. All set ! You would be able to see notifications on your mobile device.


PUSHBULLET REMOTE FUNCTIONS (remember to name your village)

  1. You would need to send a New Push using your phone or whatever
  2. Select yourself as a contact
  3. Enter commands in title (not message)
  4. List of available commands (you do not need to type in <>)
    • BOT HELP
    • BOT DELETE
    • BOT <Village Name> RESTART
    • BOT <Village Name> STOP
    • BOT <Village Name> RESUME
    • BOT <Village Name> PAUSE
    • BOT <Village Name> STATS
    • BOT <Village Name> LOG
    • BOT <Village Name> LASTRAID
    • BOT <Village Name> LASTRAIDTXT
    • BOT <Village Name> SCREENSHOT


If the guide helped you, don't forget to click Thanks  ENJOY !


● 휴대폰으로 파밍현황을 실시간으로 볼 수 있는 PushBullet를 알아봅시다


자동약탈 프로그램 마이봇이나 클래시봇은 PC에서만 실행 되기 때문에 파밍을 돌려놓고 자리를 비우면 

휴대폰으로 직접 들어가서 볼 수 밖에 없는데요


사실 프로그램 내에 Push기능이 내장되어 있습니다.


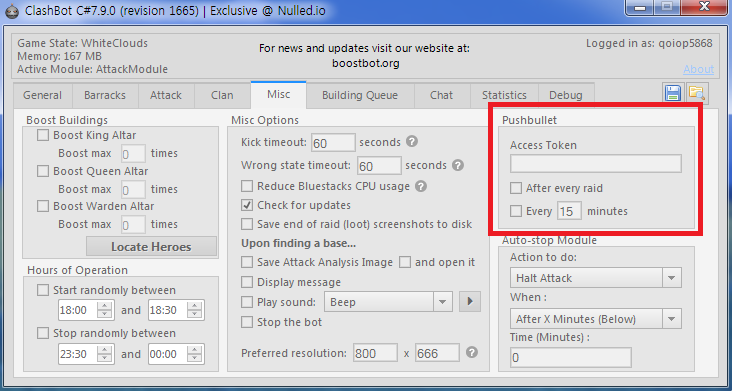
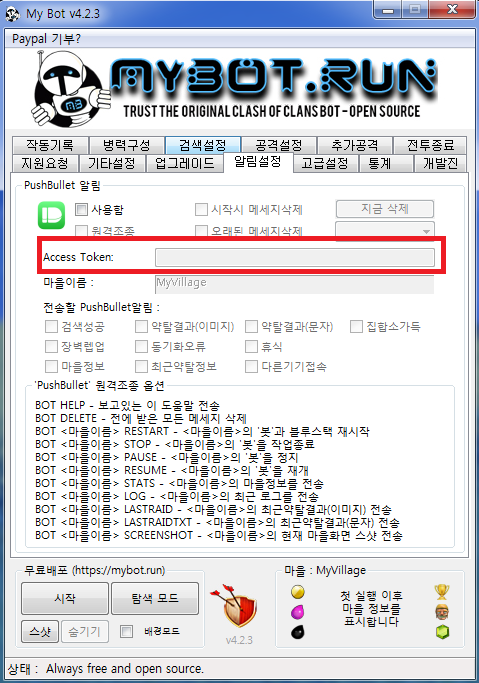
프로그램 내에 Access Token 을 입력하는 부분이 있습니다.


저게 여러분의 휴대폰에 실시간 알림을 보내주는 기능이라는거!


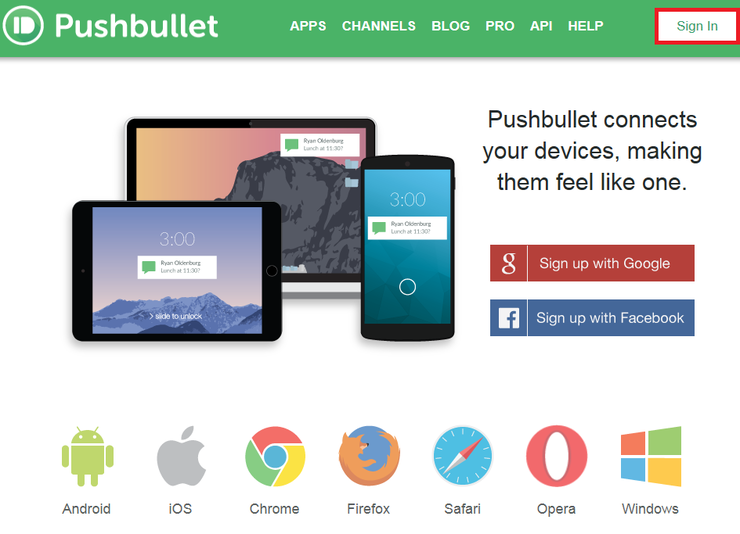
https://www.pushbullet.com/  접속


1.회원가입


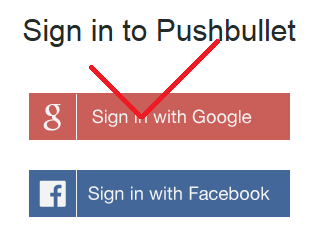
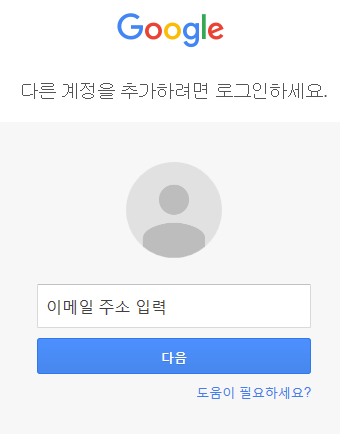
2.구글아이디로 로그인


3.구글아이디입력


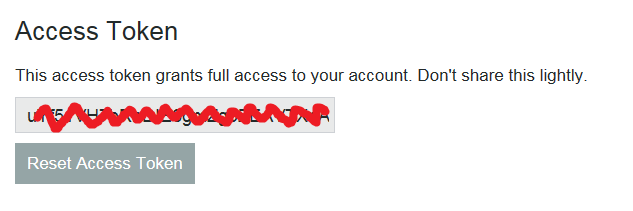
4.토큰 찾아 고고


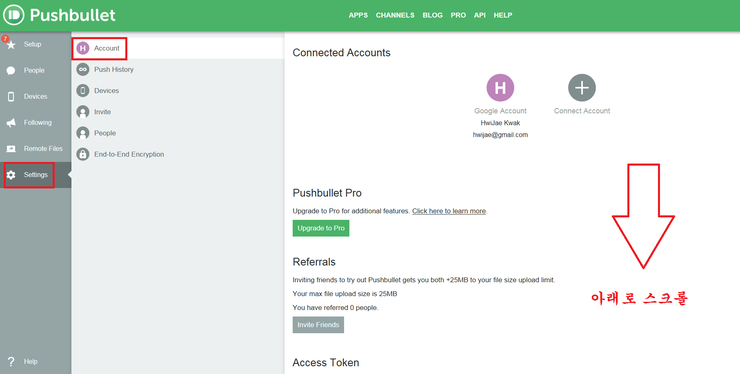
Settings -> Account -> 아래로 스크롤 -> Access Token 찾기! 


5.토큰 복사

빨간색으로 칠해져 있는 부분이 여러분의 토큰ID 복사하세요!


6.클래시봇에 토큰 입력

토큰 입력 후 클래시봇 종료 후 재실행


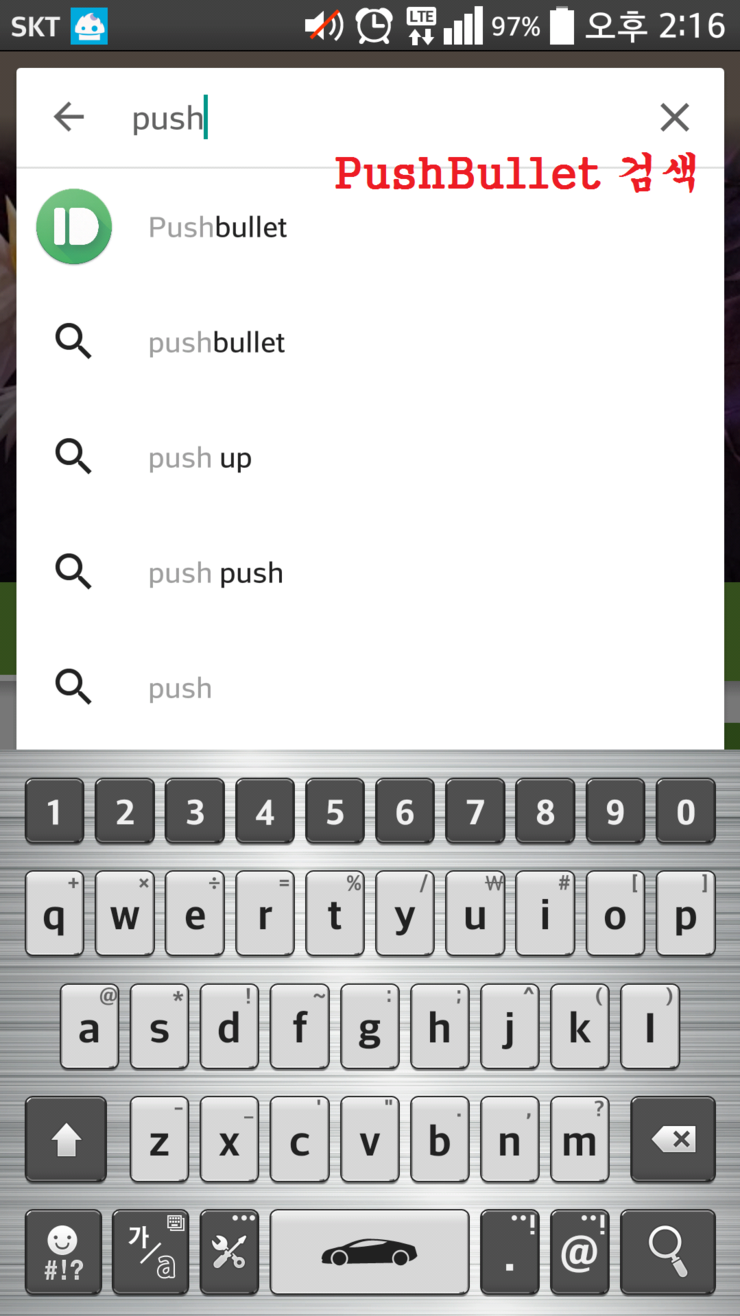
7.휴대폰에 어플 설치


플레이스토어에서 PushBullet 검색


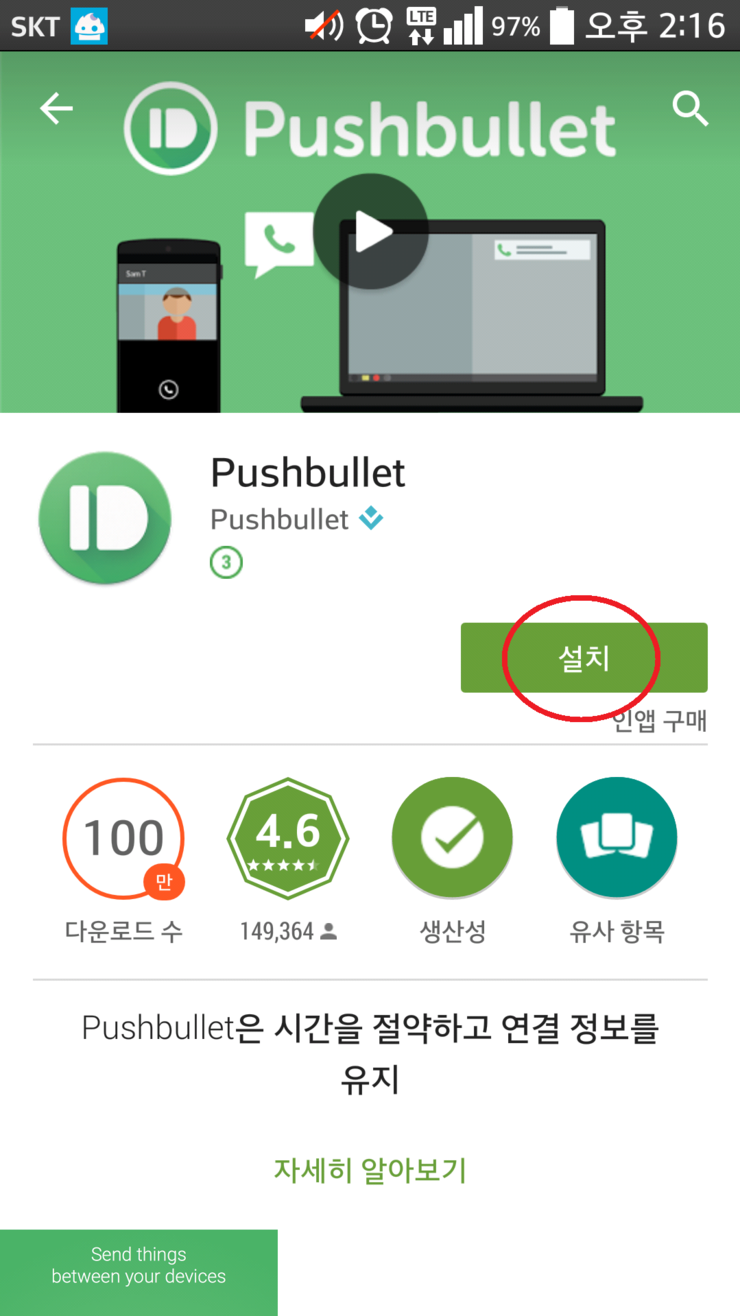
8.어플 다운로드/설치


9.어플 실행


홈페이지와 동일한 아이디로 로그인


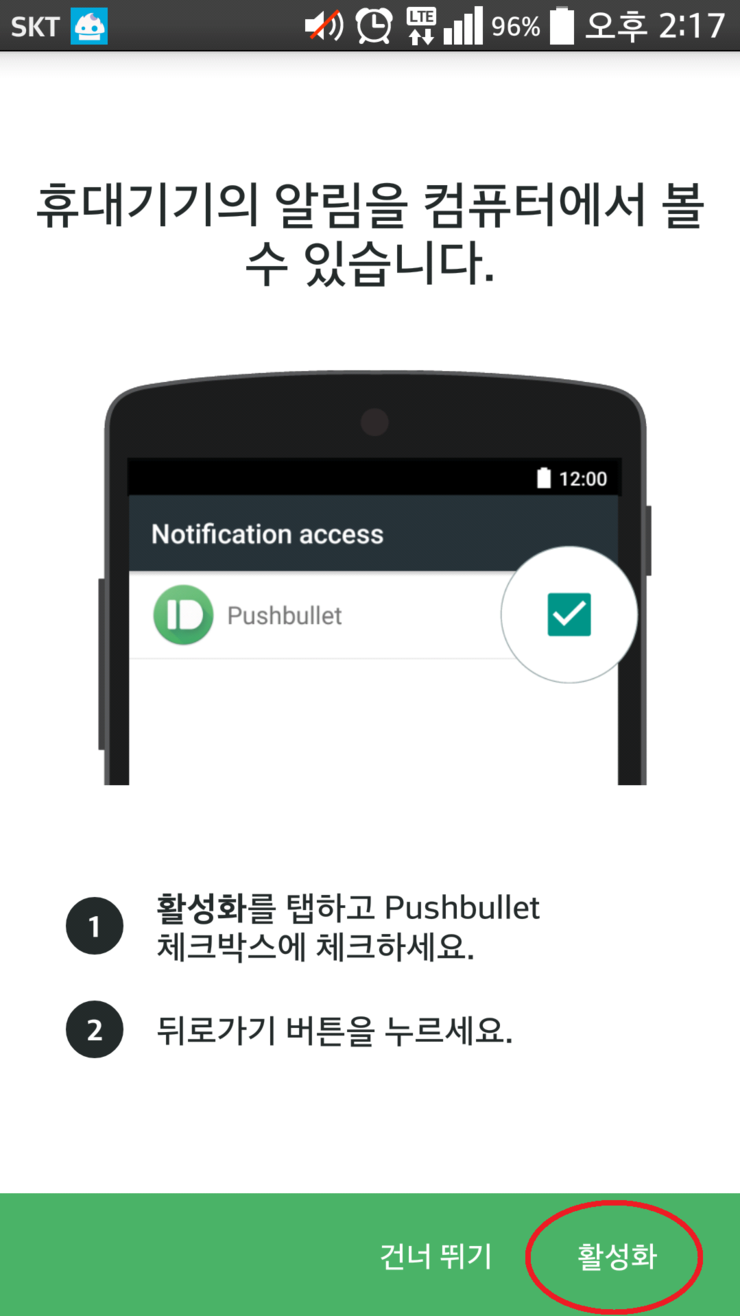
10.알림 활성화 체크


푸쉬 알림에 체크


자 여기까지 오셨으면 설정 끗~!


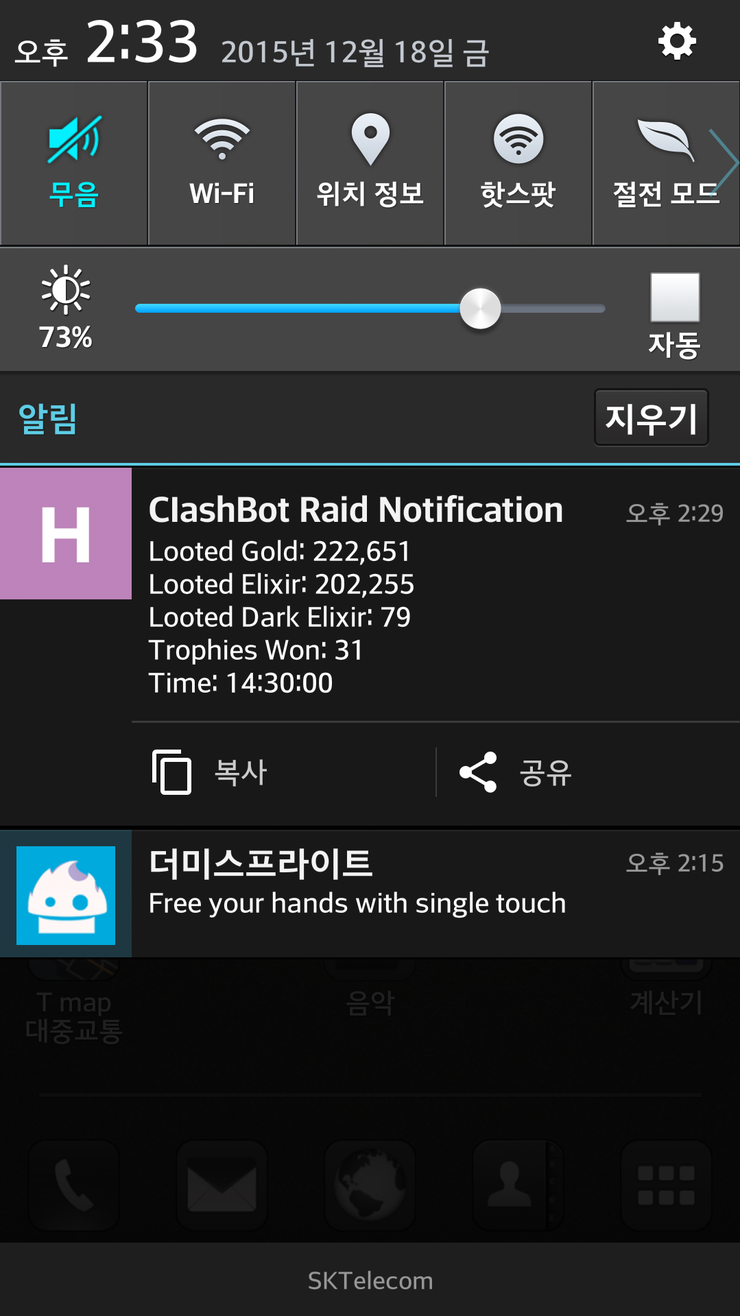
회사에서 업무하는데 휴대폰에 알림이 뙇!


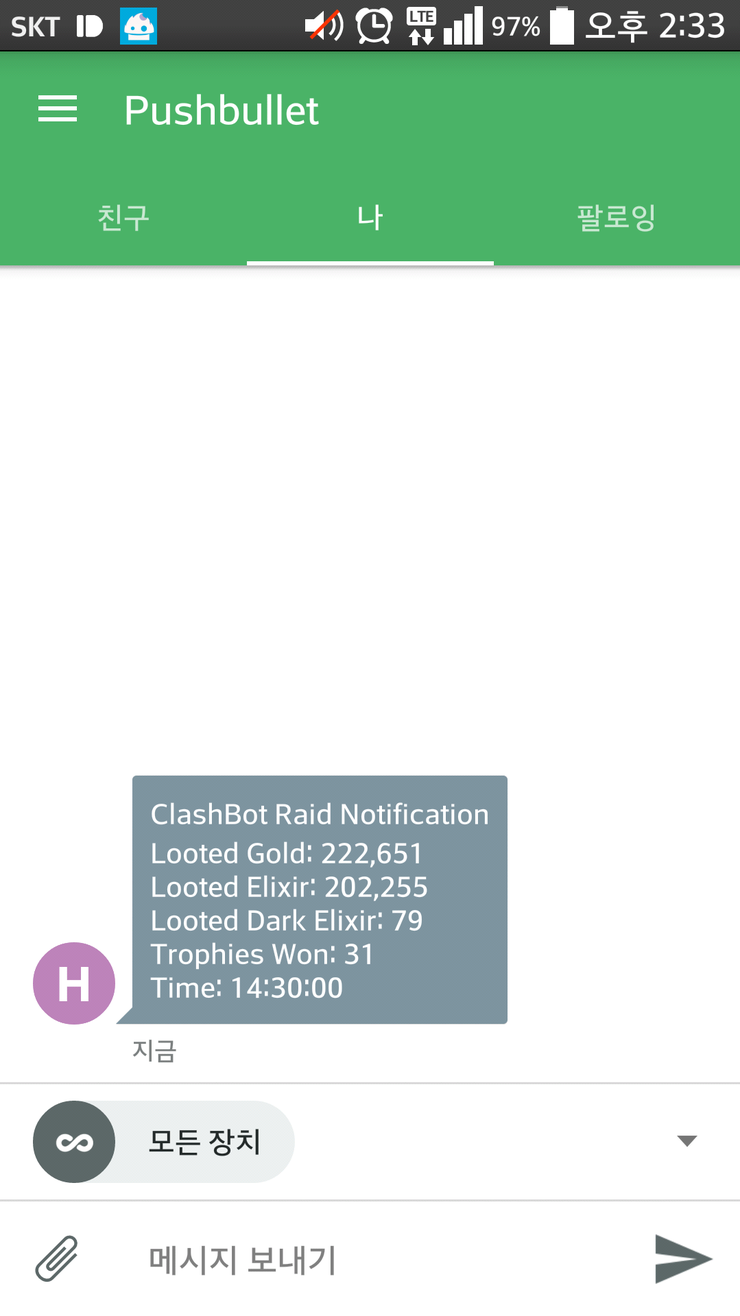
PushBullet에 들어가면 알림내역을 한번에 확인 가능


Posted by 아침의눈물
컴퓨터/Game2016. 1. 4. 14:36


● MYBOT V5.0.2 # MOD TELEGRAM NOTIFICATION [REMOTE WITH CUSTOM KEYBOARD]

https://mybot.run/forums/thread-9854.html


How to take a Telegram token:
You should begin a chat with @botfather
Botfather is a bot and help you to made a bot and give you a token.
Instructions to take token:
Create a new bot

Use the /newbot command to create a new bot. The BotFather will ask you for a name and username, then generate an authorization token for your new bot.

Usernames are 5-32 characters long and are case insensitive, but may only include Latin characters, numbers, and underscores. Your bot's username must end in ‘bot’, e.g. ‘tetris_bot’ or ‘TetrisBot’.

The token is a string along the lines of 110201543:AAHdqTcvCH1vGWJxfSeofSAs0K5PALDsaw that will be required to authorize the bot and send requests to the Bot API.

The remaining commands are pretty self-explanatory:

/setname – change your bot's name.
/setabouttext — changes the bot's about info, an even shorter text of up to 120 characters. Users will see this text on the bot's profile page. When they share your bot with someone, this text will be sent together with the link.
/setuserpic — changes the bot‘s profile pictures. It’s always nice to put a face to a name.

Please note, that it may take a few minutes for changes to take effect.


-------------------------------------------------------------------------------------------------------------------------------------
For more info please see https://core.telegram.org/bots
-------------------------------------------------------------------------------------------------------------------------------------


Instruction:
Insert your Telegram Bot token in token2 field. 
If using your Telegram Bot for first time, you should send any text like " test " , " hi " and etc. This make your chat_id used in mod. Then run MyBot windows program and wait to receive village report, then send /start and wait to receive keyboard.


Phone app screenshot:                                                                         Screen shot of the change in notification tab:

[Image: nAdIJTE.jpg] [Image: DzqnXvS.jpg]


● 텔레그램 로봇, 공식 API로 만들기


1. @BotFather를 통한 봇 등록 / 토큰 발급

텔레그램 봇은 @BotFather 봇을 통해 관리된다.

텔레그램 클라이언트에서 @botfather 사용자를 채팅 목록에 추가한다.
텔레그램 클라이언트에서@BotFather를 검색하거나
웹 브라우저에서 https://telegram.me/botfather 주소로 접속해도@BotFather 사용자를 추가할 수 있다.

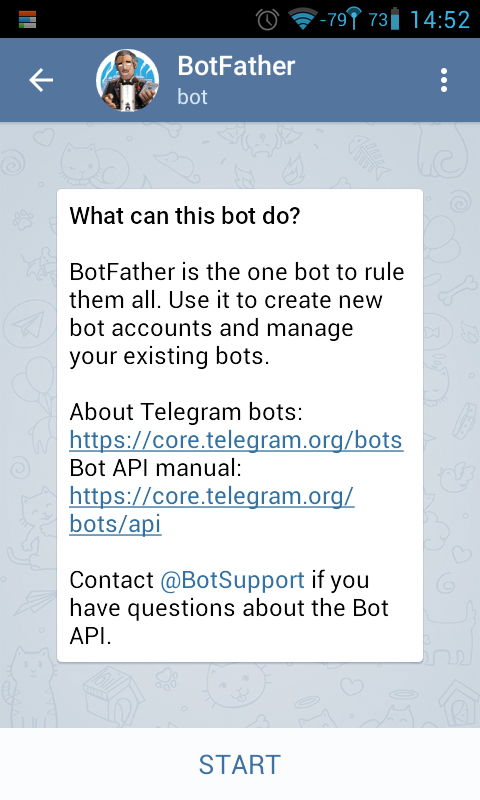
@BotFather 사용자를 채팅 목록에 추가하면 아래와 같은 화면이 나온다.

BotFather 채팅 화면

START를 누른 후 @BotFather에게 /help 메시지를 보내면 사용가능한 명령어를 알려준다.
명령어에 대한 자세한 설명은 텔레그램 봇 API 문서에 있다.

/newbot

@BotFather에게 /newbot 메시지를 보내면 봇을 등록할 수 있다.

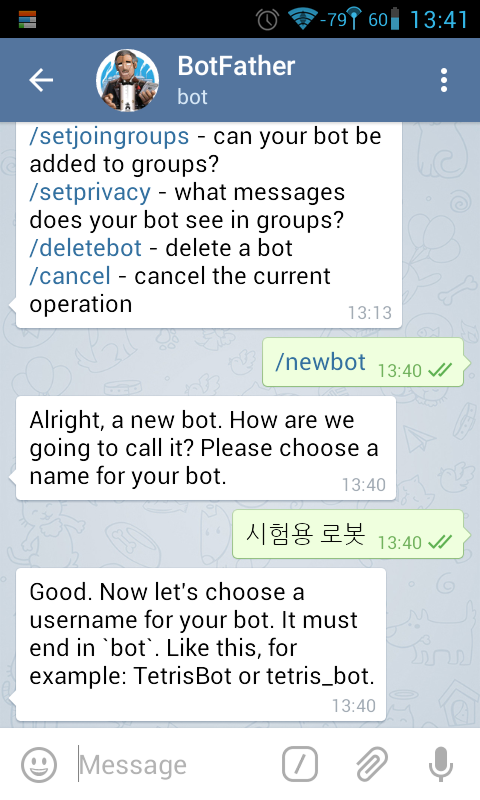
봇을 만드는 과정은 아래와 같다.

  1. /newbot 메시지를 보낸다.

  2. 봇의 이름을 입력한다. 한글도 쓸 수 있다. 예) 시험용 로봇

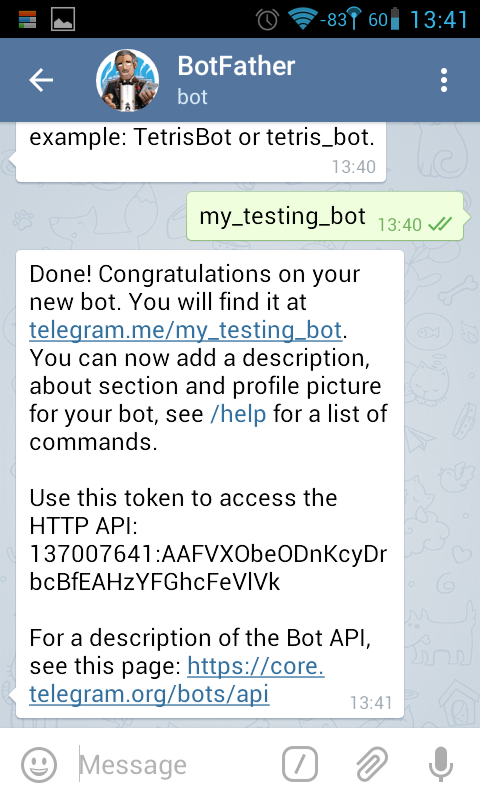
  3. 봇의 아이디를 입력한다. 한글은 쓸 수 없으며, 반드시 bot, Bot 등으로 끝나야 한다. 예)my_testing_bot

  4. @BotFather가 봇이 생성되었다고 알려주며 봇 주소와 토큰을 알려준다.
    토큰은 봇 API를 사용하기 위해 꼭 필요하므로 잘 챙겨두고, 유출되지 않도록 한다.

BotFather newbot 명령 1

BotFather newbot 명령 2


● 텔레그램 채널에 봇(bot)으로 자동 포스팅하기


1. 텔레그램 봇 만들기

봇파더(@Botfather)를 통해 만들면 됩니다.

  1. 친구초대 방식으로 채팅방에 입장하여
  2. /help 치면 명령어가 정리되어 나옵니다.
  3. /newbot 명령어로 새 봇을 만들겠다고 선언하고
  4. name을 정해달라고 물어오면, “이것저것링크” 등과 같이 이름을 정해줍니다.
  5. username을 물어보면 영문과 숫자를 사용하여 정해줍니다. 단, 끝문자는 bot으로 끝나냐 합니다.
    저는 “ththlink_Bot” 이라고 적었네요. _ 
  6. 그럼 token이라면서 복잡한 문자열을 알려주는데, 잘 메모해두도록 합니다.
    채팅방 바깥에서 이 봇에게 명령을 내리려면 반드시 필요합니다.


Posted by 아침의눈물
컴퓨터/Game2016. 1. 3. 20:13


● Mybot을 블루스택과 Droid4x를 이용하여 2개 돌리기

https://mybot.run/forums/thread-12460.html


먼저 droid4x는 droid4x 0.8.6 offline 으로 구글 서치하셔서 다운받으셔서 설치하세요. 꼭 0.8.6 버전으로 하셔야해요. 

(참고 : offline 240MB다운 받아서 설치하면 언어가 영문으로 나옴 
            Droid4XInstaller.exe 8MB짜리 다운 받아 설치시 업데이트해서 0.8.7로 설치하고 중국어로 나옴)


[Windows] Droid4X 0.8.7 beta released!

Just a hot fixes... the new update v0.8.8 will be released soon

Changelog
- Droid4X booting bug fixed
- Performance optimization

Download Links:
LINK #1 (Fast download)
LINK #2 (China only)


블루스택은 저는 블루스택2가 아닌 그냥 전부터 사용하던 블루스택1 루팅버전 쓰구 있구요.

일단 설치하고 각각 해상도를 droid4x 860*732 / BS 860*780 로 맞춰주시면 되요.
Mybot이 자동으로 해상도를 맞춰주지만 전 제가 따로 맞추었어요.

droid4x는 Droid4X Settings Tools v1.3.0 다운 받으셔서 해상도, 램 등 설정하시면 되구요

(참고

Droid4X Settings Tools v1.3.0를 실행시킨 후! (주의 : Droid4x를 실행시킨 상태서는 다른 메뉴가 나옴)
2 + enter -> 0 + enter -> 860 + enter -> 732 + enter -> 설정이 잘되었다면 y + enter 

2. Modify the resolution > 0. Custom Resolution and DPI > Please enter the width : 860 > 

 Please enter the high : 732 > Check to make sure the infomations is correct : Y > 종료 )


bs는 레지스트리 편집해서 해상도와 램 설정 하시면 됩니다.

모든 분들이 그런지는 모르겠는데.. 저의 경우에는 블루스택 레지스트리에서 cpu가상화 지원을 on 하면 droid4x 실행시 오류가 나더라구요.
그러니 저와 같이 droid4x 실행시 오류가 발생한다면HKEY_LOCAL_MACHINE\SOFTWARE\BlueStacks\Guests\Android\Config 경로에 있는 ForceVMLegacyMode는 1로 설정하셔서 off 해두셔야 합니다. 

이제 droid4와 bs에서 coc를 각각 실행합니다. 그 이후 Mybot을 각각 실행하셔야 하는데요. 

1. Mybot을 작동시켜서 Misc 탭의 Switch profile -> 01 옆에 bluestacks라고 써주세요.
2. Switch profile -> 02로 바꾸신후 droid4x라고 써주신 후 Mybot을 종료하세요.
-> 1,2번의 bluestacks와 droid4x는 구분을 위해서 한 것이구요. 편하신대로 쓰시면 됩니다.
3. 윈도우키+R을 누르신 후 
- (마이봇 경로)\Mybot.run.exe 01 Bluestacks + enter
- (마이봇 경로)\Mybot.run.exe 02 droid4x + enter

(

MyBot.run.exe 바로 가기 만들고

속성 - 대상에서 마지막 " 다음에 한칸 띄고 01 Bluestacks 이렇게 넣어주면 된다.

"(마이봇 경로)\Mybot.run.exe" 01 Bluestacks

"(마이봇 경로)\Mybot.run.exe" 02 droid4x

Bluestacks,  droid4x 등을 인식해서 마이봇이 실행을 시키니 다른 이름을 쓰면 안된다. 

바로가기 실행후 start bot을 누르면 자동으로 프로필과 연결된 Bluestacks,  droid4x 등을 실행시킨다. )


4. 위와 같이 하시면 각각의 Mybot이 실행됩니다. 그럼 각각 셋팅후 사용하시면 됩니다~

현재 droid4x의 경우 백그라운드모드가 안되요~
제 경우에는 droid4x를 실행시키면 윈도우 테마가 windows7 aero테마에서 windows7 basic 테마로 강제로 변경되더라구요. 이 경우에는 블루스택에서도 백그라운드모드를 사용하실수 없어요. 백그라운드모드는 aero 테마에서 작동합니다~


Droid4x 언어를 영어로 바꾸기


droid4x를 실행해요.


사이즈가 작아졌네요! [SysFolder]를 눌러요.


네모속의 아이콘을 클릭해요.


화면을 움직여 [A...]처럼 생긴 아이콘을 눌러줘요.


가장위 비어있는 공간을 클릭해요.


[English] 중 한개를 눌러요. 그럼 이제 빈공간들이 영문으로 보여요. 

droid4x에는 한글을 지원하지 않아서 영어로 언어를 바꿔주지 않으면 정상적인 화면을 볼 수 없어요.


Posted by 아침의눈물
컴퓨터/Game2015. 12. 22. 12:57

※ 클래시오브클랜(Clash of Clans) 15년 12월 패치후 게임봇


 마이봇 5.0

https://mybot.run/forums/thread-11920.html


Essential software :
READ this before installing the new bot :


DOWNLOAD: 5.0 - [19/12/2015]

Use this download link: 
https://github.com/MyBotRun/MyBot/archive/5.0.zip


◎ FREE MyBot v5.0 – December-2015

http://clashofclansfull.com/free-mybot-v5-0-december-2015/


Change Log 5.0:
Added:
 – Multilingual GUI
 – Bluestacks v2 and support Droid4x
 – Th/DE Side Attack the base Live
 – TH Snipes while (But perhaps this will not be useful to you anymore.)
 – Can do for the military just to donate, the bot will maintain the number of which select on the interface as part of the army.
 – Heroes of continuous upgrades


 [UPDATED] MYBOT V5 + FOUR FINGERS + REWORKED COLLECTOR IMAGES + HOW TO DEBUG IMAGES [2015/12/21]


How to downgrade;
Uninstall current Clash of Clans from BlueStacks.

  1. Download Clash of Clans v8.67.3 apk file from links below.
  2. Disable Auto-upgrade apps from play store.
    • Open Play Store
    • Open Menu (click triple bar from left of the search box) 
    • Open Settings 
    • Click Auto-update apps > Choose Do not auto-update apps.
  3. Install apk file you've downloaded. Double click on it or drag it on BlueStacks and drop.


 v8.67.3 Apk link: ApkMirror | ZippyShare  <-- 눈 오기전 COC 설치 파일 설치후 자동 업데이트 해제할것

 Rooted BS: Rooted Bluestacks 0.10.7.5601 by @Hecki

 Download Bot: ZippyShare | Mega.nz


There is no .exe file in this zip so you must have AutoIt to run the bot. If you still don't have AutoIt install it for God's sake! You have to click on Mybot.run.au3 file then click Run Script (x86) or Compile Script (86) to create an exe.  

 Download AutoIt: AutoIt3 Installer


◆ 다엘모드에 마법 사용 + 지진4방 가능한 버전 [15.12.25]

https://mega.nz/#!gh53BKwT!fDZ-v6SRNb0Jn...-G8jVoWYrU


◆ 한글 좀비 버전 [15.12.27]

https://drive.google.com/folderview?id=0...sp=sharing


◆ 한글 언어 파일 (100% 완료)

다운 : https://drive.google.com/open?id=0B-KQTj...HdERk5lMGM


DOWNLOAD:
5.0.1 - [27/12/2015]
Use this download link: 

https://github.com/MyBotRun/MyBot/archive/5.0.1.zip


DOWNLOAD:
5.0.2 - [27/12/2015]
Use this download link: 

https://github.com/MyBotRun/MyBot/archive/5.0.2.zip


라쿤봇

http://www.raccoonbot.com/


◎ Tutorial – Requirements to Use Our Bot

http://www.raccoonbot.com/raccoonbot-tutorial/

Step 1: Install Microsoft .NET 4.5.1   >> https://www.microsoft.com/en-us/download/details.aspx?id=40773

Step 2: Install BlueStacks  >> http://www.boostbot.org/BlueStacks.zip

Step 3: Install Clash of Clans

Step 4: Connect your Clash of Clans Account


Download Now


http://www.raccoonbot.com/forum/


Revision 1701 is live - Execute the updater.exe to get the latest version
Clash of Clans Update TH11 -

 (Live ticker: http://www.raccoonbot.com/forum/topic/985-clash-of-clans-update-th11/)
Right BlueStacks version is 0.9: 
http://boostbot.org/BlueStacks.zip


◎ Manual auto Raccoonbot 1.9. xx

http://clashofclansfull.com/manual-auto-raccoonbot-1-9-xx/

Requirements:
-Install the Bluestacks, Download Here
-Download the latest RaccoonBot Click Here
-Installed dot NET Framework 4.5.2

Note: Put the BS about screen 860×720 just click Start it will take 860×720, click ok, and restart the BS is being


● ClashBot & RaccoonBot [Rev.1701] [VIP/Premium] [22/12/15].

ClashBot_7.9.2.1701_exclusive.zip

RaccoonBot_1.9.2.1701_exclusive.zip


● 클래시오브클랜 오토파밍 - 클래시봇 사용법 (라쿤봇)


http://lolchang.tistory.com/77


● 라쿤봇, 클래시봇 주의 사항

둘다 같은 봇으로 teamviewer 사용시 오류가 생김


클래시봇

https://www.clashbot.org/


브로큰봇

http://www.brokenbot.org/


Posted by 아침의눈물
컴퓨터/Game2015. 12. 7. 20:50

MYBOT(공식 한글 포럼)

https://mybot.run/forums/forum-68.html


Clash Game Bot in Korea

114일 점검 후 트랩/함정보기 


설정법(1013일수정)


8홀 이하 공통세팅

8.9홀 챔피언 설정( 1017일 기준)

묻지마 따지지도 마 일단 골드 만땅 후 봐


9 + 10홀 크리2 / 마스터3 세팅 (1017일 기준)

각 홀 챔피언 등반 설정


블루스택 설치 오류 시 해결법


    ※ 8홀 초반 챔피언 등반시 바바:아처:자이=4:5:4에서 등반시 골드 가득(600) 채운후
    등반을 해도 2500(크리1)정도에서 골드가 하나도 없다.
    이때 루팅된 폰의 XMOD를 이용하여 2600(마스터3) 단계까지 등반시켜
    골드를 100만 정도 채워 놓으면 챔피언까지 등반 가능 -->> 12월 업데이트후 달라짐


Clash GameBot 4.1.1

BlueStacks App Player 0.9.24.5311 Superuser BSEasy

https://mybot.run/forums/thread-2686.html

https://docs.google.com/uc?id=0B9kjifIulueoc25CNWt5V1BuXzA&export=download


BlueStacks Rooted 0.10.7.5601.exe

https://mega.nz/#!GFVilDAL!Wkyp2xpxFOx8J_Gz8wIf0jGSxTT3IiT6xthvrHhRbME


[ Mod v4.1.1 ] Master Compilation V1.0 #17 버전

http://www39.zippyshare.com/v/DlmAs3FX/file.html 


MYBOT(공식 한·영 버전)이 정상적으로 작동하지 않을 경우 조치방법

https://mybot.run/forums/thread-10709.html


1. 사전 설치 프로그램 정상 설치 여부 확인

아래 Thread에서 필요한 모든 프로그램을 다운 받을 수 있는 MyBot Downloader라는프로그램을 배포하고 있습니다.

https://mybot.run/forums/thread-8609.html


윈도우 비스타 이상 : MyBotXP와 윈도우 10"공식적"으로는 지원하지 않습니다.

윈도우 10의 경우 대부분 이상없이 작동하는 것으로 알려졌습니다. 윈도우 10 지원에 대한 관련 게시물을 참고하시기 바랍니다.


Microsoft Visual C++ 2010 Redistributable Package (x86) : 내려받기


Microsoft .NET Framework 4.5 이상 : 내려받기


BlueStacks App Player : 아래 버전 중에서 하나만 선택해서 설치하시기 바랍니다.

- (추천) 0.9.24.5311 Superuser BSEasy ROOT by @swvr : 관련 게시물 참고 (내려받기 링크 및 설치 시 발생하는 각종 문제에 대한 해결 방법을 자세하게 설명하고 있으니 끝까지 게시물을 꼼꼼히 읽은 후에 설치하시기 바랍니다.)

- 0.10.7.5601 Rooted by @Hecki : 관련 게시물  내려받기 링크

- 공식 최신 버전 내려받기 /


루팅되지 않은 공식 버전은 숨겨진 트랩을 보여주는 등의 기능이 있는 CSV Mod를 설치·실행하실 수 없습니다. , 윈도우 10에서는 공식 버전이 더 잘 작동된다는 의견도 있으니 참고하시기 바랍니다.

AutoIt 프로그램 : 내려받기


◆ 15년 12월  홀에 눈 덮히기전 COC 입니다

http://bc.vc/F6U41u   COC 8.67.3버전 
마이봇이 나오는 시점이 홀에 눈덮히는 시점이라 홀 인식이 잘안되는듯 합니다
그래서 홀 눈덮히기전으로 돌려주면 잘돌아가요

- 구글플레이 자동 업데이트 꺼야함


● 눈내리는거 해결하실려면
블루스택은 루팅버전을 까신후에 Root Explorer 어플을 까신후

DATA/DATA/com.supercell.clashofclans/UPDATE/CVS/폴더로 들어가셔서
client_globals.csv 을 삭제하신후 클래시오브 클랜을 실행하시면 눈내리지 않습니다.


CGB V4.0 설정 하기!

https://mybot.run/forums/thread-5924.html


윈도우 비스타/7/8/8.1 이상만 가능하다고 하네요. xp는 사용 안될거 같네요.


Microsft Visual C++ 2010 Redistributable package(x86) 를 설치 하라고 합니다. : 다운!


Microsoft .NET Framework 4.5 이상을 설치 하라고 합니다. : 다운!


블루스택 0.9.24.5311 루팅버전을 설치하라네요. : 다운!


윈도우 레지스트리 860x720 을 추가 하라고 합니다. : 다운!


그리고 구버전 설정파일을 사용하지 말라고 하고

   CGBv4 를 받으라고 합니다. 공식버전은 아래에서! : 다운!


비공식 버전이지만 오류가 일부 수정된 CGBv4 버전은 아래에서 : 다운!

게임 언어는 영어로 설정하셔야 합니다.


Clash Game Bot 사용전 이거부터 하자. 

http://blog.daum.net/firelee1022


* 설치전 준비할 파일

     (1)  블루스택 (BlueStacks App Player 0.9.17.4138 SuperSu BSEasy) - 요고로만 깔아라!!! 아주 중요하다.


     (2)  Revo Uninstaller Pro 3.1.1 (블택 설치된 애들은 이거로 지워야한다) 검색 못하는 넘을 위해서;; 준다.


(3)  BlueStacks.reg.byToday9 컴박사 오늘찌느님께서 죽이게 편집하셨다. 찬양하자)


1.  Microsoft Visual C+ 설치

     https://www.microsoft.com/en-sg/download/details.aspx?id=5555


2. Microsoft.NET Framework 4.5이상 설치 (vps에는 설치되어있다. 패스햐)

    https://www.microsoft.com/da-dk/download/details.aspx?id=30653


3. Autoit 설치

   https://www.autoitscript.com/site/autoit/downloads/


4. 블루스택 설치 후 구글계정 만들고 COC 설치 게임언어 잉글리쉬


5. 윈도우에서 

  1) BlueStacks.reg.byToday 폴더 안에 RUN ME LAST.bat 파일을 관리자 권한으로 실행

  2) 아래와 같은 화면이 뜬다아래 메모리 설정을 제외하고 모두  Y 를 입력한다.

     본인의 메모리가 2기가라면        Modify BlueStacks memory to 1024 gb?   y 입력

                                              Modify BlueStacks memory to 2048 gb?   n 입력


     본인의 메모리가 4기가이상이면   

                                              Modify BlueStacks memory to 1024 gb?  n 입력

                                              Modify BlueStacks memory to 2048 gb?   y 입력 


  bat 파일 새로 편집해서(10) 지난번 패치 후 client_golbals.csv 부분은 삭제했다.

  업대이트 폴더 미리 생성되어 있는 거 쓰면 된다   


     3) 블루스택 해상도 조절완료 / C:\ProgramData\BlueStacks\UserData\SharedFolder 폴더에 csv logic 폴더 생성완료.


 4)  storage/sdcard/windows/BstSharedFolder/csv 폴더 안의 texts.csv 복사

     data/data/com.supercell.clashofclans/update/csv 폴더안에  붙여넣기

          storage/sdcard/windows/BstSharedFolder/logic 폴더안의 파일 2

                                      (buildings.csv / traps.csv) 개별적으로 복사

    data/data/com.supercell.clashofclans/update logic 폴더안에 개별적으로 붙여넣기


CSV 모드 설치 방법 : https://mybot.run/forums/thread-10621.html

https://mybot.run/forums/thread-9996.html

위 주소로 가셔서 CsvMOD.rar 다운받습니다 (http://clashoftp.altervista.org/Download.html)

물론 블루스택이 루팅 되어있어야 합니다.


2. 시스템 환경 설정 확인

그래픽 드라이버 최신 버전 업데이트

- Intel GPU : 내려받기

- AMD GPU : 내려받기

- Nvidia GPU : 웹사이트 링크


윈도우즈 해상도는 최소 1336x768 이상색상 깊이32bit로 설정 (관련 게시물 참고)


전원설정에서 화면 꺼짐 포함 절전 기능 모두 비활성화

BlueStacks 해상도 860x720으로 설정 게시물 참고

(위에서 추천한 루팅된 0.9.24.5311 버전을 설치 방법에 따라 제대로 설치하셨다면 해상도는 860x720으로 이미 설정되어 있습니다.)


윈도우 화면 DPI100%로 설정 : 윈도우 버전별 설정법은 네이버나 구글에 "윈도우 DPI 설정"으로 검색하시면 쉽게 따라 하실 수 있습니다.


3. MyBot 내려받기 및 압축해제 관련


4. MyBot 실행 중 주의 사항

MyBot 마을회관 레벨6 이상에서 정상작동하므로 그 이하 레벨에서는 오작동할 가능성이 있습니다. 관련 게시물을 참고하세요.

최소한 훈련소가 2개 이상 사용 가능해야 정상적으로 작동합니다. 업그레이드 등의 이유로 훈련소가 2개 미만으로 사용 가능한 경우 "훈련소별 설정(Barrack Mode)"을 이용하시기 바랍니다.


AutoIt으로 컴파일(Compile) 및 실행(Run) 시 설치된 윈도우가 x86인지 x64인지와 무관하게 x86으로 하셔야 합니다.


MyBot이 실행 중일 때에는 마우스를 블루스택 화면 안에 두지 마세요.


MyBot 창과 BlueStack 창을 겹치도록 배치하지 마세요.


게임상 언어는 반드시 "영어"로 설정하시기 바랍니다.


화면이 완전히 축소(Zoomed out)되는지 확인하시기 바랍니다. MyBot이 자동으로 화면을 축소하지 못한다면,

- BlueStack 화면에서 아래 방향 화살표 키로 화면 축소가 가능한 경우 : 관련게시물을 참고하여 조치

- 아래 방향 화살표 키로 화면 축소가 안 되는 경우 : 루팅된 BlueStack 설치 후 화면 축소가 기본으로 되어 있는 CSV MOD 설치 필요 (관련게시물 참고)


5. 일반적으로 많이 발생하는 오류 유형별 대처

[출처[FAQ] COMMON BUGS - CHECK HERE FIRST BEFORE MAKING NEW THREAD


6. 기타 보고된 오류

TeamViewer를 사용하시는 경우 Quickconnect 버튼(각 프로그램 창의 오른쪽 위 최소화 버튼 왼쪽에 좌우 화살표 버튼) 기능이 활성화되어있으면 MyBot에서 이미지 검색 등에 필요한 DLL을 읽어오는데 오류가 발생할 수 있습니다. 해당 기능을 사용하지 않도록 설정하시기 바랍니다.


Background 모드(배경모드)가 작동하지 않을 때 : 관련 게시물 참고


※ 실행시 화면이 위로 이동하며 훈련소 유닛 설정을 하지 못하고 계속 훈련소만 껐다 킬때 (이미지 인식 오류)

- Aero 테마를 기본 테마로 변경할것 


 [GUIDE] BOTTING MULTIPLE ACCOUNTS ON SAME PC USING VMWARE

https://mybot.run/forums/thread-3072.html?highlight=VMware


List of prerequisites:

Decent PC! (quiet possibly the most important thing before going any further) At least 4-8gigs of RAM for the host machine as well as 2gigs per VM

Knowledge of how to install an operating system

Knowledge of how to actually install the bot does help too


VMware Workstation (Download)


Tiny7 (Download)


Bluestacks (Download)


Bluestacks resolution fixer (Download)


VC2010 (Download)


Dot Net framework (Download)


ClashGameBot (duh Einstein!) (Download)


● 윈도우7 Tiny버전 설치 방법~!!

http://chiwooscom.tistory.com/852


Posted by 아침의눈물